
I remember a time when a cop going to work grabbed that 2 ¼” Sam Browne belt with holstered handgun, spare ammo, cuffs-in-cuff-case, nightstick ring off of the hook and put it around his waist. Taking time to thread the belt keepers on and snap them up – to keep under belt and gun belt together – he’d make sure he had his keys and went off to work.
That made for interesting events sometimes. One memorable occasion was the deputy who stood for inspection, went to unload his revolver and found it was already empty – he’d emptied it at home, cleaning the gun for an anticipated inspection, failed to load it before holstering it in the rig hanging from the hook. Had he needed that gun for a lethal situation, he could well have died surprised.
There are other situations, but the old gun belt on a hook with the handgun holstered was a staple of movie/TV fiction and I’ve seen it more than a little in real life.
Fast forward to the 21st Century, where the sidearms are semiautos, a good many agencies issue the guns, there’s a maintenance schedule with an agency armorer – I confess to a lack of knowledge as to how a cop “making ready” does so these days.
A consideration for police agencies issuing or authorizing the carry and use of sidearms with optical sights is how each individual should get them ready for their shift. Similar to the “make ready” process in training, it’s a forced habit; process is critical. It’s like a preflight of the aircraft, checking your SCUBA gear before a dive – any mission critical endeavor.
If you have to shoot to defend your life or the lives of others and you get “click” instead of “bang,” it could be a dead round. It could be a failure to “preflight the aircraft.”
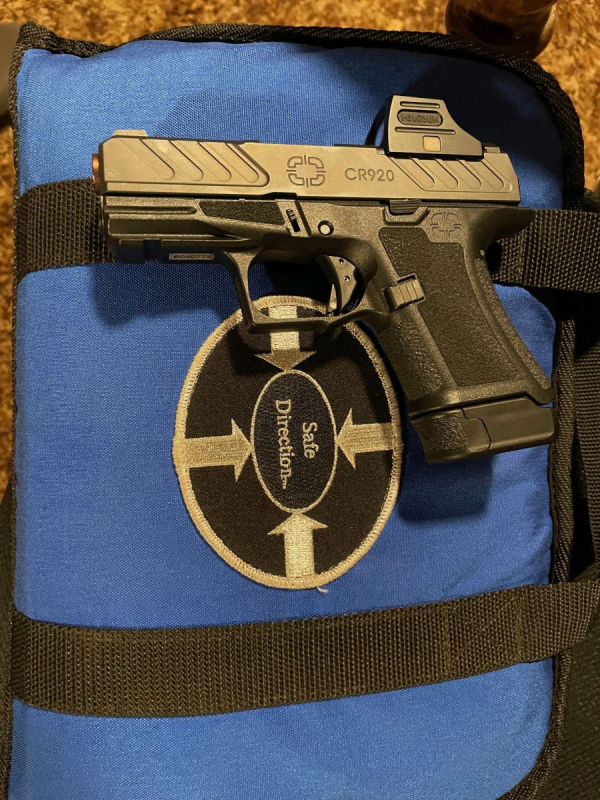
Consider the pistol-mounted optical sight. An addition to the pistol, it has to be checked before going on duty – whether you’re a cop or an armed citizen.
On the range, there’s a process. You hear it listed by the instructor after your relay is in place:
Protect your eyes, protect your ears. Draw (or otherwise acquire) the pistol. Covering a safe direction (down range), check the chamber visually and physically -- first. Then ensure that the gun returned to battery. Then check that the magazine is completely loaded; press that top round back if needed. Seat the magazine, “tap and tug.”
Why check the chamber first? That’s the first round out of the gun. If it’s not there, you get the aforementioned surprise. Seating the magazine and using a gentle tug on the floorplate ensures that the magazine is “in battery” and doesn’t bail out of the gun, landing on your foot as you draw.
With an electro-optic sight, you have additional concerns. I’d heard about some of these from an instructor in the midst of doing the agency transition to PMOs. Being silly, I failed to take notes. I asked around. One response I got was from Erick Gelhaus – retired peace officer, Gunsite instructor, operator of Cougar Mountain Solutions – who teaches the use of PMOs to citizens and LE – as well as editor of American Cop. On May 7th, he took to that venue to explain the officer’s process to make ready for duty. This is remarkably similar to the process to make ready for training.
He adds his method to chamber check the pistol with an optics-equipped sidearm. In an email to me, he explained his process.
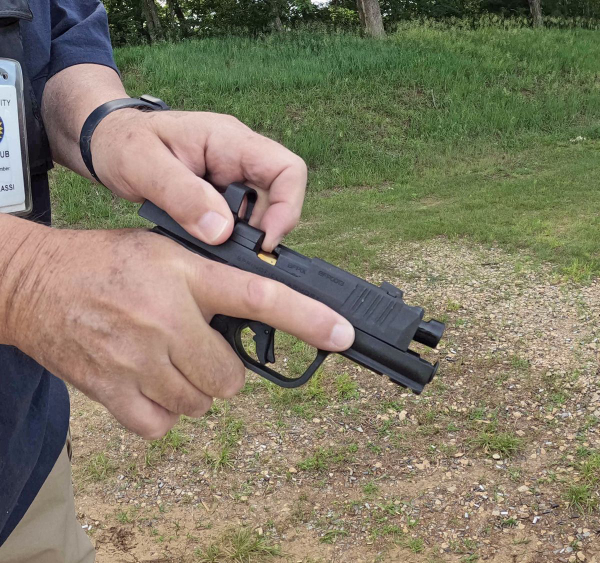
“ … chamber checks with an optic can easily be done by left or right-handers by grasping the rear serrations on either side of & below the optic between the thumb & middle finger of the non-shooting hand while the shooting hand still holds the pistol. Retract the slide slightly and feel for the round with the support hand index (finger) dropping down into the ejection in front of the optic and/or just looking for it at that point.”
Consider Rule Three: keeping that trigger finger at register should be ingrained. Now you segregate the index finger of the non-shooting hand. Using the thumb and middle finger on the rear grasping grooves, draw the slide back a little. Your index finger is centered over the optic. Point it down toward the ejection port, reach in and feel for the loaded round – while you observe Rule 2. The muzzle has to be covering the safest available direction. After feeling that chambered round, remove your index finger from the ejection port and guide the slide home. Tap on the rear of the slide with the heel of the non-gun hand or otherwise ensure the piece is in battery.
Regardless of “handedness,” this process is the same – it’s just the left hand in the control (firing) grip on the pistol with the right hand controlling slide movement and feeling for that chambered round.
Have the gun close enough to your body to control movement of the slide relative to a stationary frame.
Why feel? Why not look?
- Because we too often “look without seeing.” That hurried glance “just because it’s a rule” often leads to problems. It’s like just shaking your head when you are to “look and assess.” Feel adds that additional sensory component.
- The design of a good many pistols conflicts with needing to see; the barrel hood, in conditions of compromised lighting, can cast a shadow over a loaded round. You may be checking to ensure the piece is unloaded.
- What happens if you have to “make ready” in the dark – perhaps you’re in a situation where turning on a light will create problems. It’s a competing harm. Having the trained skill to “check by feel” is necessary in daylight, critical in conditions of adverse light.
It’s also the sign of the pro.
Finally, Erick recommends checking to ensure the reticle is (1) present (that is, the optic is functional) and (2) at the required intensity. It should be at the intensity that it was set the last time you checked it. If you check it against a light-colored wall with the weapon-mounted light turned on, it should be bright enough to be quickly acquired. Also, make it a habit to change batteries early – he recommends every six-to-twelve months.
Better safe than “hunting the dot.”
— Rich Grassi